使用之前需要先安装好git
安装node
node -v 查看node版本
npm -v 查看npm版本
npm install -g cnpm --registry=http://registry.npm.taobao.org 安装淘宝的cnpm 管理器
cnpm -v 查看cnpm版本
安装hexo框架
cnpm install -g hexo-cli 安装hexo框架
hexo -v 查看hexo版本
mkdir blog 创建blog目录
cd blog 进入blog目录
用hexo来生成博客
在blog目录中进行操作
sudo hexo init 生成博客,初始化博客
hexo s 启动本地博客服务
hexo n "我的第一篇文章" 创建新的文章
cd source/_posts/ 进入文件夹查看创建的文件.md格式
ls 列出目录下的文件
ls -l 提供了一个简单的目录列表
pwd 查看默认工作目录的完整路径
vim 我的第一篇文章.md 可以编辑内容 :wq表示退出
- 如果vim后面没有加名字显示
E32:没有文件名,则输入:w file这样可以退出
cd ../.. 退出到blog文件夹
hexo clean 清理数据
hexo g 生成
hexo s 再次启动本地博客服务
将博客部署到GitHub
创建一个新的仓库 YourGithubName.github.io 必须是这个名字
cnpm install --save hexo-deployer-git在blog目录下安装git部署插件配置_config.yml
vim _config.yml进入文件
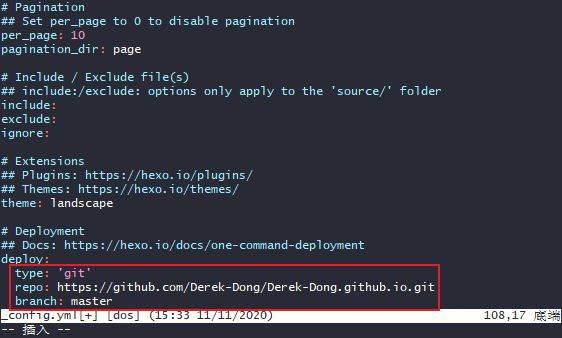
1 | # Extensions |
hexo d 部署到Github仓库里,之后输入账号和密码
https://YourGithubName.github.io/ 访问这个地址可以查看博客
自定义一个主题
git clone https://github.com/litten/hexo-theme-yilia.git themes/yilia 下载yilia主题到本地
修改hexo根目录下的 _config.yml 文件
- theme: yilia
hexo clean 清理数据
hexo g 生成
hexo s 启动本地博客服务
hexo d 部署到远程Github仓库
https://YourGithubName.github.io/ #查看博客
更换主题
git clone https://github.com/iissnan/hexo-theme-next themes/next 下载next主题
运行之后页面无法正常渲染,显示
1 | {% extends '_layout.swig' %} {% import '_macro/post.swig' as post_template %} {% import '_macro/sidebar.swig' as sidebar_template %} {% block title %}{{ config.title }}{% if theme.index_with_subtitle and config.subtitle %} - {{config.subtitle }}{% endif %}{% endblock %} {% block page_class %} {% if is_home() %}page-home{% endif -%} {% endblock %} {% block content %} |
npm i hexo-renderer-swig Hexo 5 把 swig 渲染插件删了,需要单独安装
一些问题
hexo 中使用typora设置图片路径
设置post_asset_folder 为 true, 安装插件 asset-image
npm install https://github.com/CodeFalling/hexo-asset-image设置图片为相对路径
./${filename}/
hexo clean && hexo generate && hexo s 运行查看
设置本地搜索
安装并使用 hexo-generator-search:
在
~/userName.github.io目录下执行以下命令进行安装:1
npm install hexo-generator-search --save
编辑站点配置文件
_config.yml,新增以下内容到任意位置:1
2
3search:
path: search.xml
field: post编辑主题配置文件
_config.yml,启用本地搜索功能:1
2
3# Local search
local_search:
enable: true
添加文章浏览次数、站点访问量
编辑主题配置文件
_config.yml,搜索busuanzi_count字段,修改相关内容如下:1
2
3
4
5
6
7
8
9
10
11
12
13
14
15
16
17# Show PV/UV of the website/page with busuanzi.
# Get more information on http://ibruce.info/2015/04/04/busuanzi/
busuanzi_count:
# count values only if the other configs are false
enable: true
# custom uv span for the whole site
site_uv: true
site_uv_header: <i class="fa fa-user"></i>访问人数
site_uv_footer:
# custom pv span for the whole site
site_pv: true
site_pv_header: <i class="fa fa-eye"></i>总访问量
site_pv_footer: 次
# custom pv span for one page only
page_pv: true
page_pv_header: <i class="fa fa-file-o"></i>浏览
page_pv_footer: 次
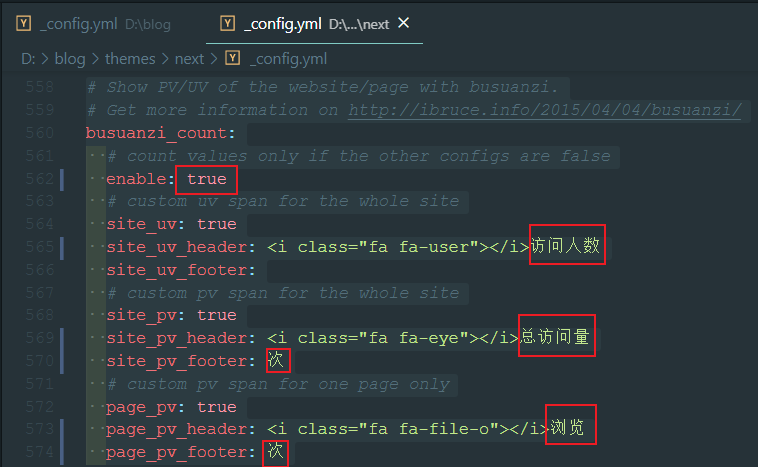
注意:所设置的功能,是启用不蒜子统计,仅限于文章页面显示阅读书,在首页不显示。
Busuanzi网站统计失效问题
解决方法:
- 到 hexo 的 themes 文件夹下, 进入
\themes\next\layout_third-party\analytics目录 - 打开
busuanzi-counter.swig - 将
src="https://dn-lbstatics.qbox.me/busuanzi/2.3/busuanzi.pure.mini.js"修改为src="https://busuanzi.ibruce.info/busuanzi/2.3/busuanzi.pure.mini.js"
然后使用 hexo g 、hexo d 命令重启服务器即可生效。
实现文章统计功能
- 编辑主题配置文件,配置如下:
1 | # Post wordcount display settings |
打开Blog\themes\next\layout\_macro\post.swig,添加以下代码:
1 | <span title="{{ __('post.wordcount') }}"> |
分页显示问题

- 修改: /Blog/themes/next/layout/_partials/pagination.swig
1 | {% if page.prev or page.next %} |
底部隐藏由Hexo强力驱动、主题–NexT.Mist
- 打开
Blog/themes/next/layout/_partials/footer.swig,注释掉相应代码。
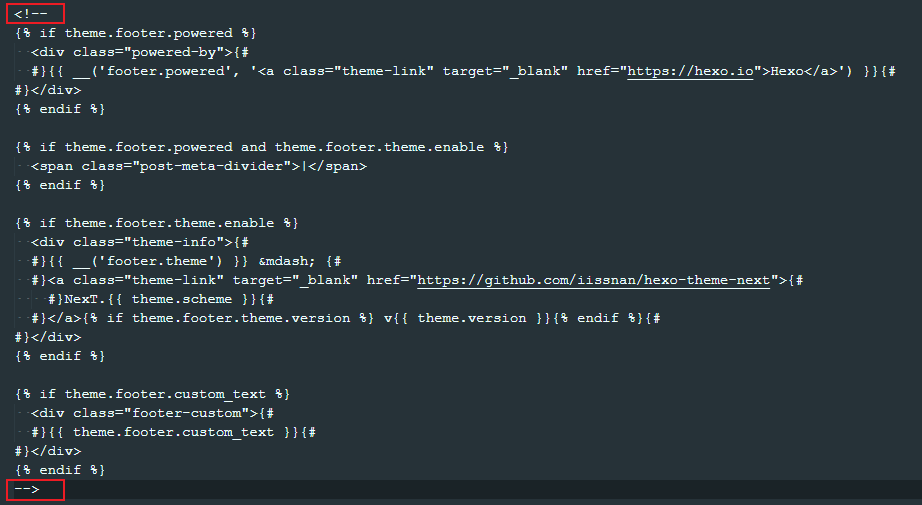
1 | //用下面的符号注释,注释代码用下面括号括起来 |
修改代码块自定义样式
- 打开
Blog\themes\next\source\css\_custom\custom.styl,添加以下代码:
1 | // Custom styles. |
主页文章添加阴影效果
- 打开
Blog\themes\next\source\css\_custom\custom.styl,添加以下代码:
1 | // 主页文章添加阴影效果 |
Hexo博客提交百度和Google收录
站点地图sitemap
Sitemap 可方便管理员通知搜索引擎他们网站上有哪些可供抓取的网页,有助于让别人更好地通过搜索到自己的博客。
是一个页面,上面放置了网站上需要搜索引擎抓取的所有页面的链接。站点地图可以告诉搜索引擎网站上有哪些可供抓取的网页,以便搜索引擎可以更加智能地抓取网站。
生成站点地图
安装百度和Google的站点地图生成插件:
1 | npm install hexo-generator-baidu-sitemap --save |
修改配置文件
修改站点配置文件_config.yml,添加以下内容:
1 | # 自动生成sitemap |
生成和部署
执行生成和部署命令:
1 | hexo g |
此时,进入public目录,你会发现里面有sitemap.xml和baidusitemap.xml两个文件,这就是生成的站点地图。里面包含了网站上所有页面的链接,搜索引擎通过这两个文件来抓取网站页面。
- sitemap.xml用来提交给Google
- baidusitemap.xml用来提交给百度
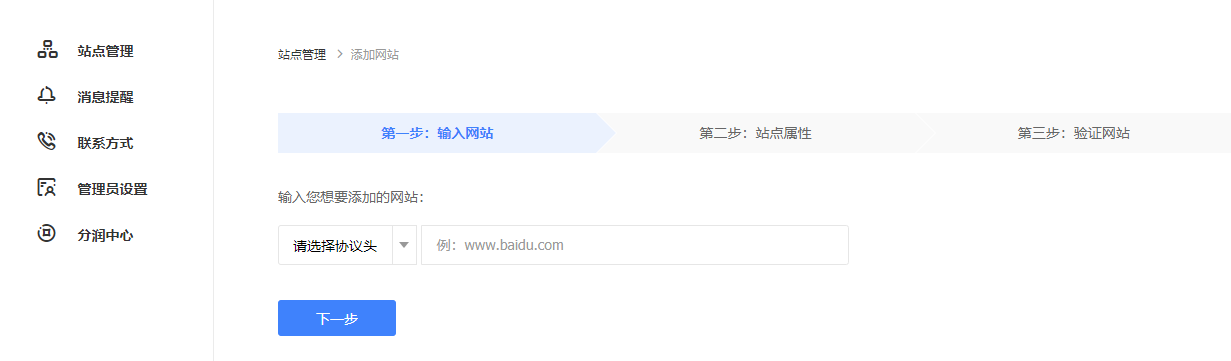
百度站长平台
添加站点
选择添加站点:
验证站点
进行站点验证:
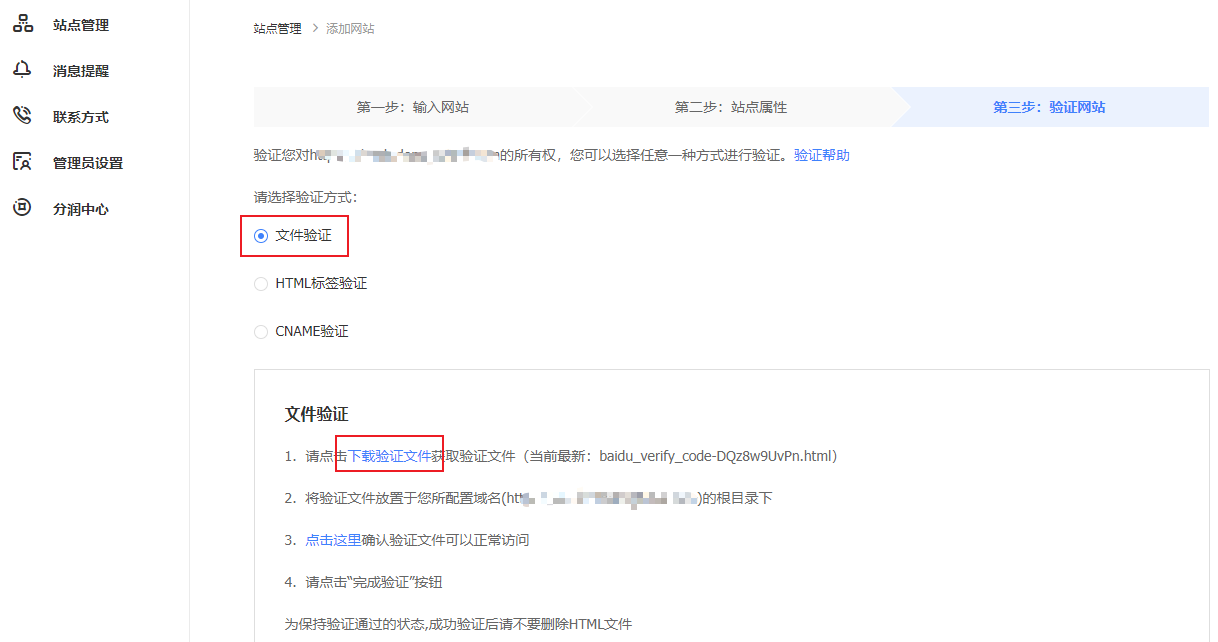
这里我们选择文件验证,下载验证文件到本地,放置在themes/next/source目录下。执行生成和部署命令:
1 | hexo g |
点击完成验证即可。
链接提交
百度站长平台的链接提交方式分为自动提交和手动提交两种,此处只讲自动提交,手动提交按照要求操作即可。
主动推送
主动推送最为快速的提交方式,是被百度收录最快的推送方式。主动推送可以通过安装插件实现:
1 | npm install hexo-baidu-url-submit --save |
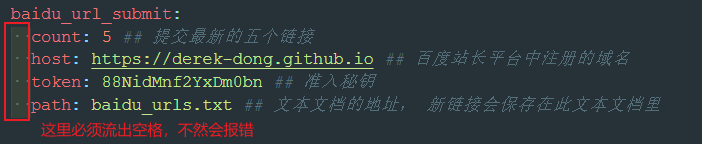
修改站点配置文件_config.yml,添加以下内容:
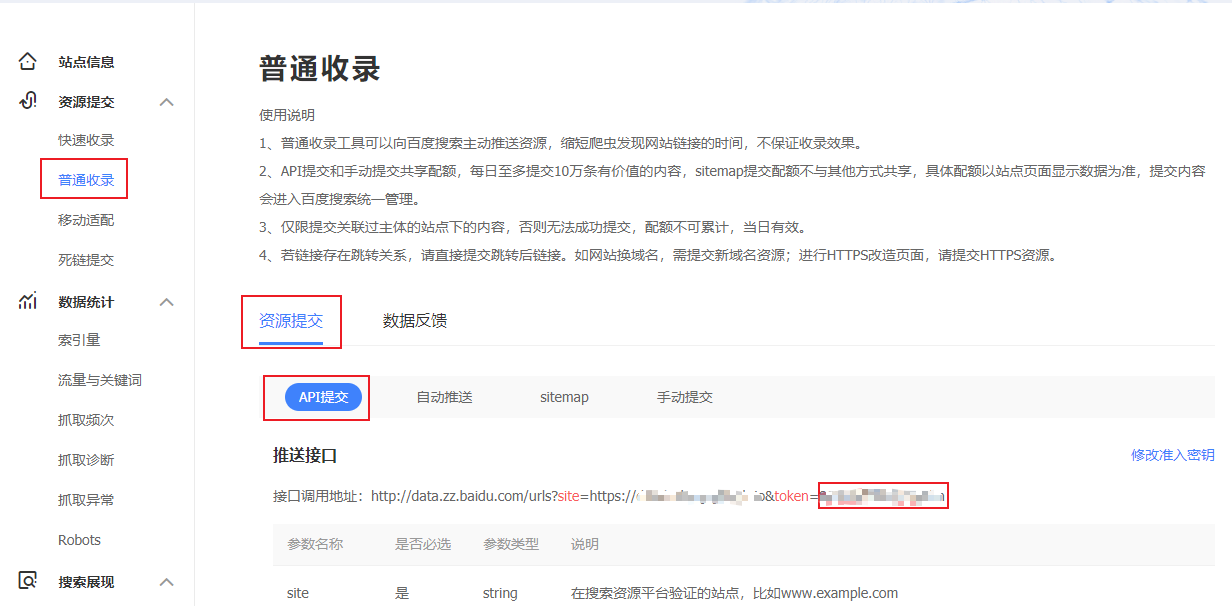
1 | baidu_url_submit: |
报错
1 | FATAL { |
1.npm remove hexo-baidu-url-submit
2.hexo clean
3.hexo g
其次,记得查看_config.yml文件中url的值, 必须包含是百度站长平台注册的域名, 比如:
1 | # URL |
最后,加入新的deployer:
1 | deploy: |
其主动推送的实现原理如下:
- 新链接的产生,
hexo generate会产生一个文本文件,里面包含最新的链接 - 新链接的提交,
hexo deploy会从上述文件中读取链接,提交至百度搜索引擎
自动推送
安装自动推送JS代码的网页,在页面被访问时,页面URL将立即被推送给百度。
修改主题目录下的layout/post.swig文件,末尾添加自动推送代码,代码如下:
1 | <script> |
在主题中开启
1 | # Enable baidu push so that the blog will push the url to baidu automatically which is very helpful for SEO |
sitemap提交
我们之前已经说过如何生成sitemap文件,这时就需要我们生成的sitemap文件了。
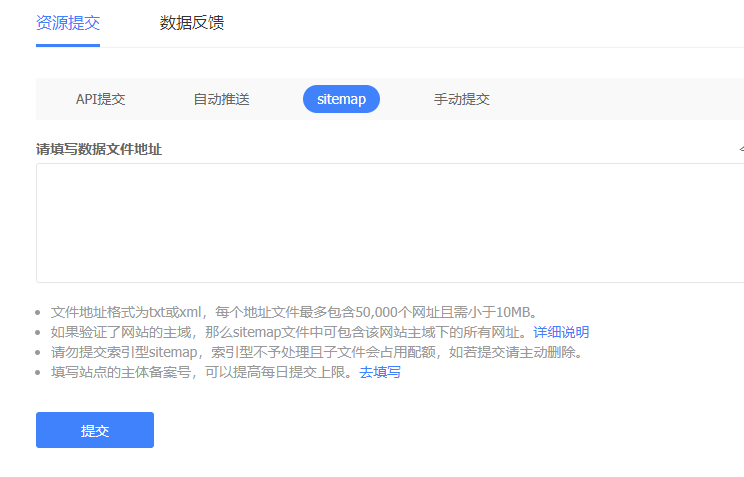
输入以下内容到输入框里:
1 | http://YourGithubName.github.io/baidusitemap.xml |
输入验证码后,提交即可。一般情况下,百度会在一个小时内处理该文件,并提取其中的url。
Google网站站长
在提交Google之前,要解决一个大家都知道的问题,关于如何登录Google。这里就不再说了,相信你们有办法。
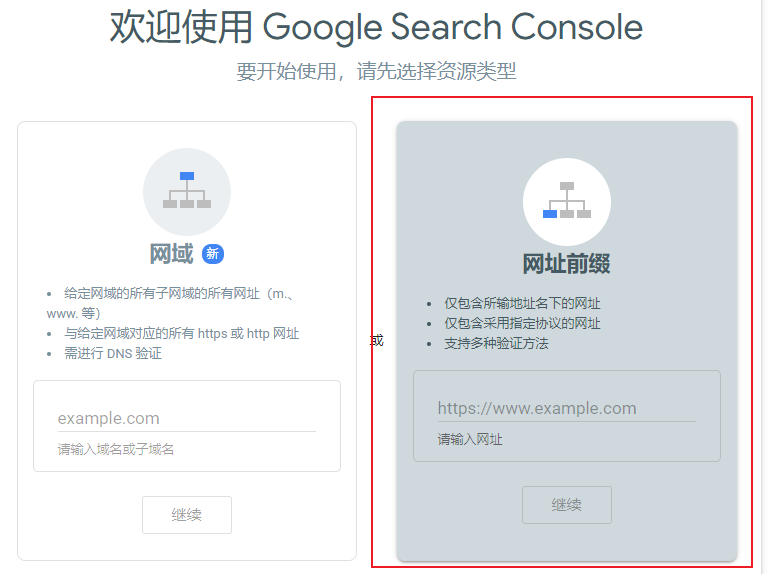
添加站点
登录Google网站站长,进入Search Console,点击添加属性进行站点添加:
验证站点
右边的方式同百度平台一样,下载Google验证文件,放到source下themes/next/source目录中:
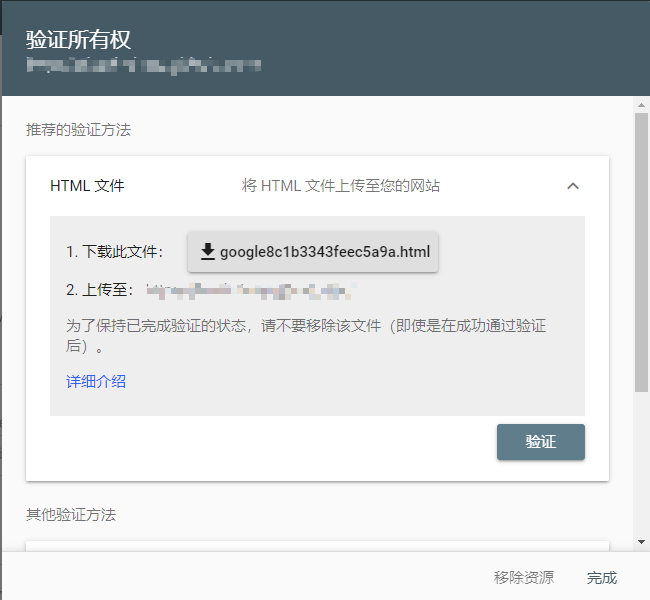
重新生成和部署:
1 | hexo g |
部署完成之后,进行验证即可。
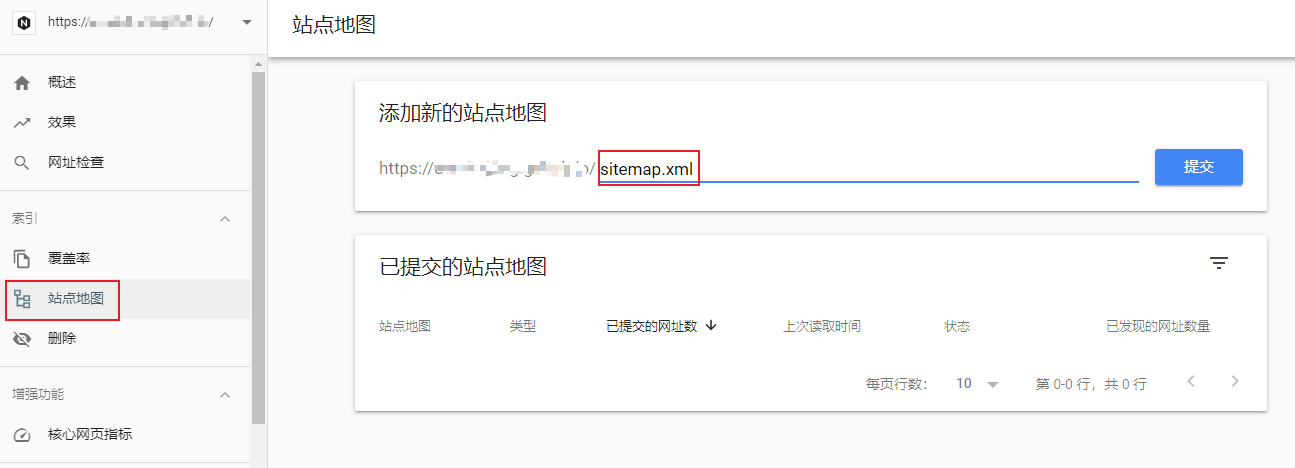
添加站点地图
在抓取里面,点击站点地图,进行添加:
GitHub中Hexo next主题下搭建的博客中增加PDF插件
1 | npm install --save hexo-pdf |
外部文章
1 | {% pdf http://7xov2f.com1.z0.glb.clouddn.com/bash_freshman.pdf %} |
本地上传
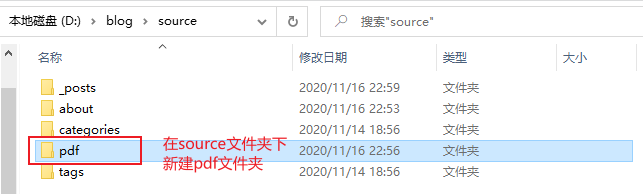
在博客source\_posts\,文件夹下创建一个文章如test.md
在文件中加入{% pdf /pdf/test.pdf %}
1 | --- |